Ultimate Guide On Improving The Ride Handling Of Your Gas-Powered Class A Motorhome
Gas-powered Class A motorhomes are rather notorious for being a pain to drive. Diesel rigs handle differently, but the gas powered rigs are often built on truck chassis that just don’t handle great.
In this guide, I wanted to take some time and research and put together a one-stop guide, with everything in one place, on the different chassis options as well as the various options for improving the ride quality.
Let’s go…
Table of ContentsClass A Motorhome Chassis OptionsFord Or Workhorse: Which Is Better?The Common Problems With Ride QualityWays To Get A Smoother RideThe ShocksSumoSpringsLiquidSpringAir BagsWays To Solve The Sway Problem (Or Body Roll)The Anti-Sway BarThe Cheap Handling Fix (or CHF)Solving The Tail WagNever Forget Your Tires (and Proper Inflation)Looking For Worn PartsInstalling a Trac BarWhat About Steering Stabilizers?Do You Need All Of It? What Helps The Most?Some Final Thoughts
NOTE: This article will be kept updated as well as improved over time. It is meant to be a one-stop reference on the topic.
Class A Motorhome Chassis Options
There are pretty much 2 main options for gas-powered Class A’s:
- Ford F-53 (now the primary option)
- Workhorse Custom Chassis (discontinued, but still common on used rigs)
Motorhome chassis are stripped chassis. The manufacturer creates a stripped vehicle (chassis only), similar to the image below. That chassis is then purchased by the RV manufacturer and they build the house on top.
The Ford F-53 chassis is incredibly common on gas-powered Class A’s these days, since it is the chassis that Ford builds specifically for Class A motorhomes.
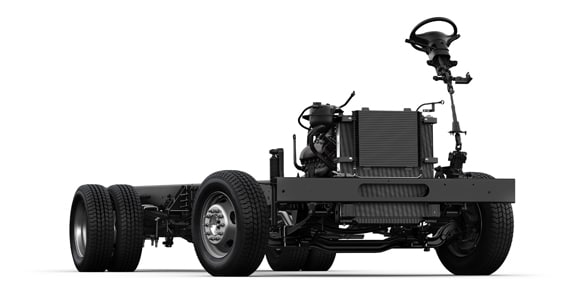
The F53 has been around forever. They have just released different model years with different specs. For instance, my first motorhome used the F53 with the Ford 460 engine. Today’s rigs use the same chassis, but using the 6.8L Triton V10.
Workhorse is another option you still see a lot (my rig is on a Workhorse), but the Workhorse chassis for RVs was discontinued by Navistar in 2012 so you only see them on used rigs these days.
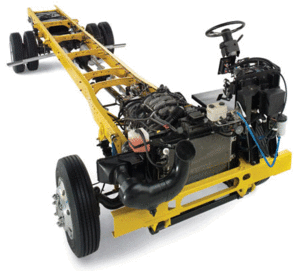
Workhorse began with the P32 chassis, then moved into the W-series chassis with the W20, W22, W24 and W25.5. One great feature of these W-series chassis is the Allison transmission (which is solid) coupled with the GM 8.1 Vortec engine.
As strange as it might seem, these 2 chassis are the only real options for gas-powered Class A’s. And now that Workhorse is gone, we’re pretty much only on the Ford F53 now. The other options are all for diesel rigs.
Ford Or Workhorse: Which Is Better?
Well, that is sort of the debate of the ages. 😉 Everybody has an opinion. A simple search through the RV forums will show you all kinds of opinions, none more “right” than another.
In the end, I don’t think it matters.
When you buy a motorhome, you should buy it for the floor plan and features you want, along with the general condition and history. The manufacturer of the chassis should be the least of your concerns.
Some have worried that there may be difficulty getting parts for the Workhorse chassis since it has been discontinued. As an owner of a rig on the W22 chassis, I can say I’ve had no issues whatsoever. The engine is a Chevy, so parts are parts. The Allison transmission is bulletproof and, likewise, easy to work on. I just don’t think it is an issue.
If you’re buying a new gas-powered Class A, you have no choices. You’ll end up with the F53.
If you’re buying used, you’ll see both options.
Both chassis ride like tanks. That’s why we’ll be talking about improving the ride quality because neither one is a luxury ride by itself. 🙂
I might be a bit partial, but I do like the Allison transmission on my W22-based rig. But, aside from that, truthfully…
Neither is better. Anybody who says one blows the other away is just giving their opinion.
The Common Problems With Ride Quality
When you wade through all the experiences and tales of driving a big Class A rig, it basically boils down to the same set of “issues”…
- A rough ride, like a horse buggy.
- Body sway, where the rig feels like it is tipping over a little bit.
- Rear swinging or “tail wagging the dog”. It is the sensation of the rear axle moving side to side, therefore causing you to feel like you’re constantly correcting at the steering wheel
- Steering Play, where the steering wheel can be moved side to side without noticeable shift in direction, leading to over-correction.
There are other potential issues, of course. For instance, vehicle listing, bottoming out over a bump, etc. These issues are usually caused by worn components, however, and not necessarily a “fact of life” for Class A motorhomes.
Many beginner drivers of Class A’s are nervous already because of the big windshield and the truck-like feel of it. But, it doesn’t help when the vehicle feels like it is constantly trying to get away from you and you’re constantly trying to avoid a crash.
Many Class A’s have a bumpy ride. They ride like trucks. There are some things you can do about it (see below), however you cannot expect perfection. In the end, you’re not ever going to get a Class A gas-powered rig to ride down the road like a luxury car. It is still a house riding on a truck chassis, so you just do the best you can.
Body sway is common. You take a turn, for instance, and you almost feel like the rig is going to tip over. Or a truck passes you and the whole rig just sways side-to-side. Again, these chassis are stripped down by the manufacturer and then the RV company builds a big house on top of it. It is tall and has a high center of gravity, so it will lean without things to correct it.
The “tail wagging the dog” effect is when you’re driving down the road and it feels like you constantly have to correct the steering side-to-side. There are a few things that contribute to this:
- The vehicle moving laterally over top the rear axle.
- Looseness on the steering components
- External factors that push the vehicle around, like wind or ruts in the road.
These things all combine to create a driving experience that takes some getting used to.
Many owners look to do some aftermarket upgrades to try to correct it. We’ll go over several of the options here in this article, but an important reminder…
You cannot expect perfection.
You can make a gas-powered Class A drive much better, but it will never be a luxury car. Frankly, it will be hard to ever make it drive like a top-end diesel pusher. But, you can make them better.
So, let’s get into it…
Ways To Get A Smoother Ride
Some Class A’s can almost rattle the teeth out of your head on the right road. So, many people look for ways to make their rigs handle the bumps better.
The Shocks
One of the first things to look at are your shocks.

3 very popular options among people looking to upgrade their shocks are:
First, you need to look at what brand your chassis already has. For instance, some rigs come with Bilstein shocks already. With Koni, many people love the Koni FSD shocks (Frequency Selective Damping).
I personally installed the Koni FSD shocks on my rig to replace the factory shocks that were still on it when I bought my rig. It was a noticeable improvement, although it wasn’t any kind of magic pill.
In the end, I think it comes down to the shocks your rig already has and how old they are. Shocks do wear out. If your shocks are aged or showing signs of issues, then you may gain some improvement in ride quality by replacing your shocks.
SumoSprings
SumoSprings are basically supplemental springs made out of closed-cell polyurethane. They are built to supplement your existing springs and help absorb changes in the road surface by giving a progressive cushioning effect.

SumoSprings can be installed both front and rear, or just one axle. They bolt between the vehicle frame the existing leaf springs.
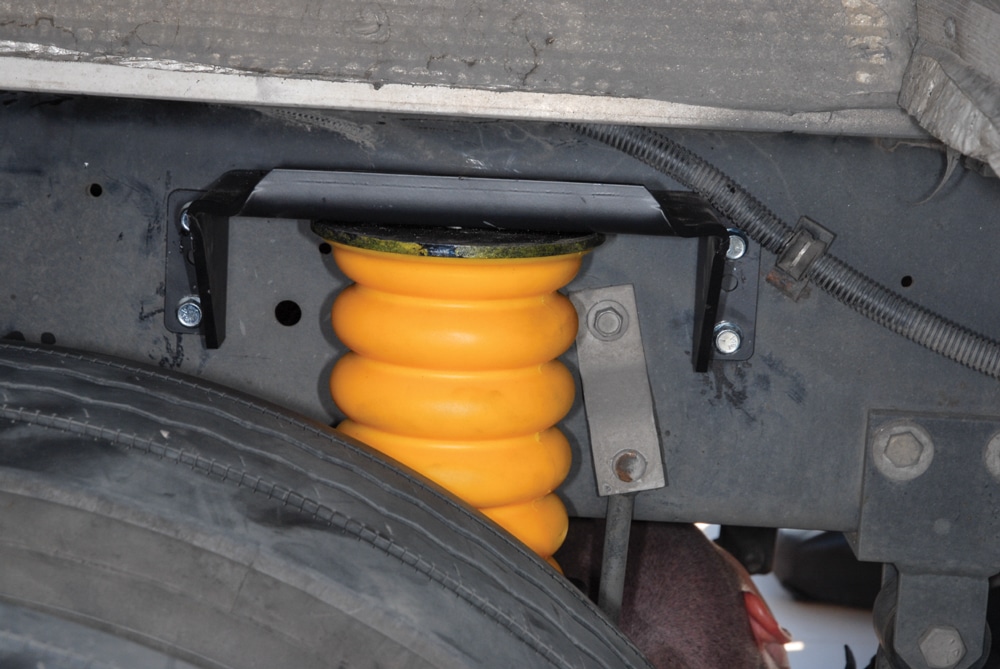
So, as the vehicle encounters bumps, these SumoSprings will help provide a cushion effect to the leaf spring movement, therefore giving a smoother ride over bumps.
Many SumpSpring users have reported multiple improvements, such as reduced body roll, smoother handling on rough roads, and even reductions in squeaks and rattling inside the rig as a result of the smoother bumps.
LiquidSpring
LiquidSpring is a much more involved (and expensive) option that is purported to make a gas rig ride more like a diesel. It is a “smart” suspension system… which means it literally has a computer onboard that is constantly adjusting things.
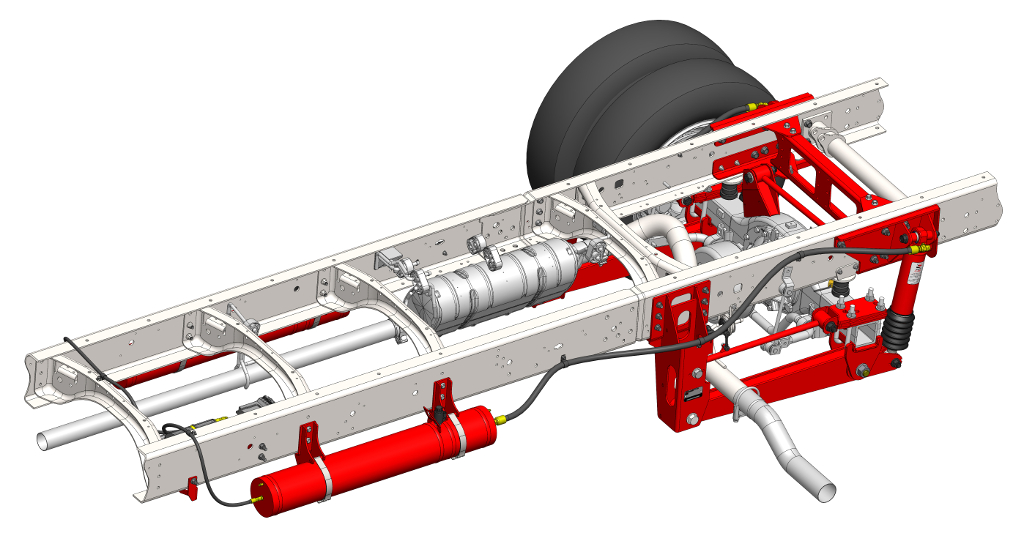
The full name is LiquidSpring Compressible Liquid Adaptive Suspension System, or CLASS. And as the name says, this is a liquid-based spring that uses some kind of proprietary shock-absorbing liquid to make your rig ride…. well, on liquid. And there are pumps in the system to move liquid around and adjust pressure, more or less like hydraulics.
All I can say is…. whoah. 😉
Sounds complicated. Sounds like a lot of things that could go wrong. And, from the looks of it, sounds like a helluva lot of money, since it sounds like this whole system could cost up to $12,000 to install (around $8,000 for the gear and around another $4,000 for the labor).
Pardon me while I pick my jaw up off the floor.
But, hey, Motorhome magazine did a review and they seemed pretty happy with the result. As they said:
When it comes to improving road manners of the Ford F-53 chassis, the LiquidSpring system over delivers on the results. The CLASS transformation is truly a game changer for owners looking to move Class A gasser ride quality and handling to a higher level.
I would hope so for that kind of cost.
Air Bags
Air bags as part of the suspension are pretty common on diesels, but not gas rigs. Us lowly gas rig drivers get stuck with leaf springs.
But, you can install air bags to help smooth out the ride on your gas-powered Class A. The bags usually install right into the springs, giving a cushion effect as the springs contract.
My first rig had air bags installed that you would control manually. There were literally pump valves on the sides that I would pump up like a bike tire. More modern solutions have an air pump so you don’t have to mess with that.
Air Lift is a company that makes air bag systems for RVs. Firestone Ride Rite is another brand for the F53 chassis.
Ways To Solve The Sway Problem (Or Body Roll)
So, you’re taking a turn and it feels like you’re about to tip over.
Body roll is a nagging issue. It is caused by the fact that the house created a higher center of gravity than the chassis was really designed to accommodate for fully. So, given the right forces, the rig will feel like it is swaying side to side.
The solution here is called just… the anti-sway bar.
Yeah, I know. It’s complicated. 😉
The Anti-Sway Bar
All an anti-sway bar goes is creates a hard link between the suspension and the frame of the vehicle. In a way, it sorta “ties down” the frame (and hence the house on top) straight down onto the axle, allowing the weight to be distributed more evenly.
By default, the weight of the house and frame can rock because the only thing stopping it is the springs. The anti-sway bar gives a bracing quality to the setup, making it tighter and will therefore counteract the side pressures.
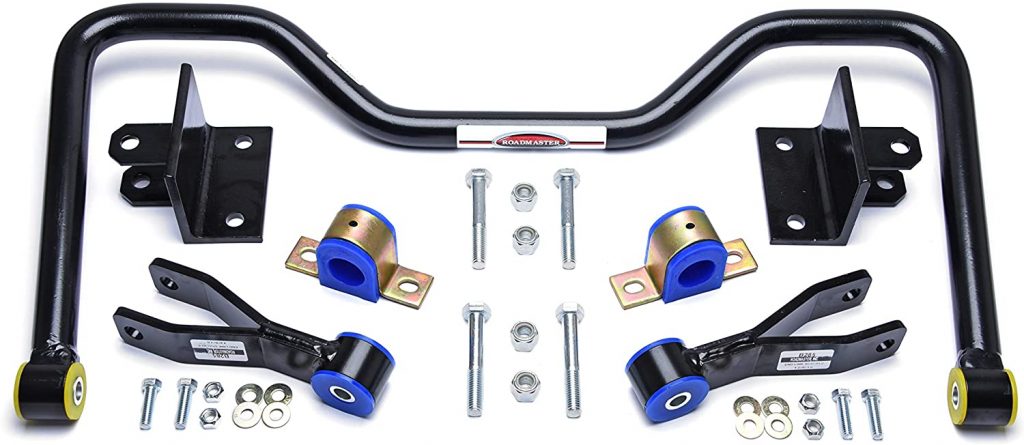
Anti-sway bars can be installed on either the front or rear axle – or both. Your chassis likely already has anti-sway bars, but you can still gain an improvement by installing a beefier, stronger bar. Larger, stronger anti-sway bars provide a stronger counteracting force and therefore just work better.
Typically, front-axle anti-sway bars are cheaper and easier to install. For this reason, they can be a fairly high ROI ride improvement and you may be able to do the install yourself. The rear axle is usually more involved, but not an overly complex job.
As with most things in the RV world, there are a lot of opinions on which is best. 🙂 But, when you’re shopping around for anti-sway bars, you’re usually going to be looking at:
Blue Ox sells sway bars, too, but with more limited set of options.
Hellwig will usually save you some money and are perfectly solid sway bars. Roadmaster is more of a known brand and will generally be more expensive. Roadmaster, though, is a very solid option.
I did install the Roadmaster rear-axle anti-sway bar on my rig. It definitely helped with body roll, but did not eliminate it. I will probably install a bar on the front soon to assist. Plus…
How you load the vehicle definitely is a factor as well. More on that below.
The Cheap Handling Fix (or CHF)
If you’ve got an F53 chassis, then there’s a “hack” that you can do on your chassis that is said to reduce the body roll and sway.
In short, what you’re doing is adjusting the built-on sway bars by moving them to a different set of adjustment holes. This puts more pressure on the existing anti-sway bars and can help reduce sway.
Endless RVing has a nice video on how to do it:
Many people DIY this “hack”… and it obviously costs nothing. I never did this on my F53, so I have no personal experience with how well it works. If you have a Workhorse, this won’t apply to you.
Solving The Tail Wag
The “tail wagging the dog” effect is when it feels like the rear end of the motorhome is moving side to side just a bit. The end effect is that it feels like the RV is not driving in a straight line and you feel the need to constantly correct the direction at the steering wheel.
Gas powered Class A’s are rather notorious for this direct from factory. The stripped chassis is designed to be cost effective and not so much for drive performance. So, it leaves it to us to try to solve the issue after market.
First off, you can never forget your tires…
Never Forget Your Tires (and Proper Inflation)
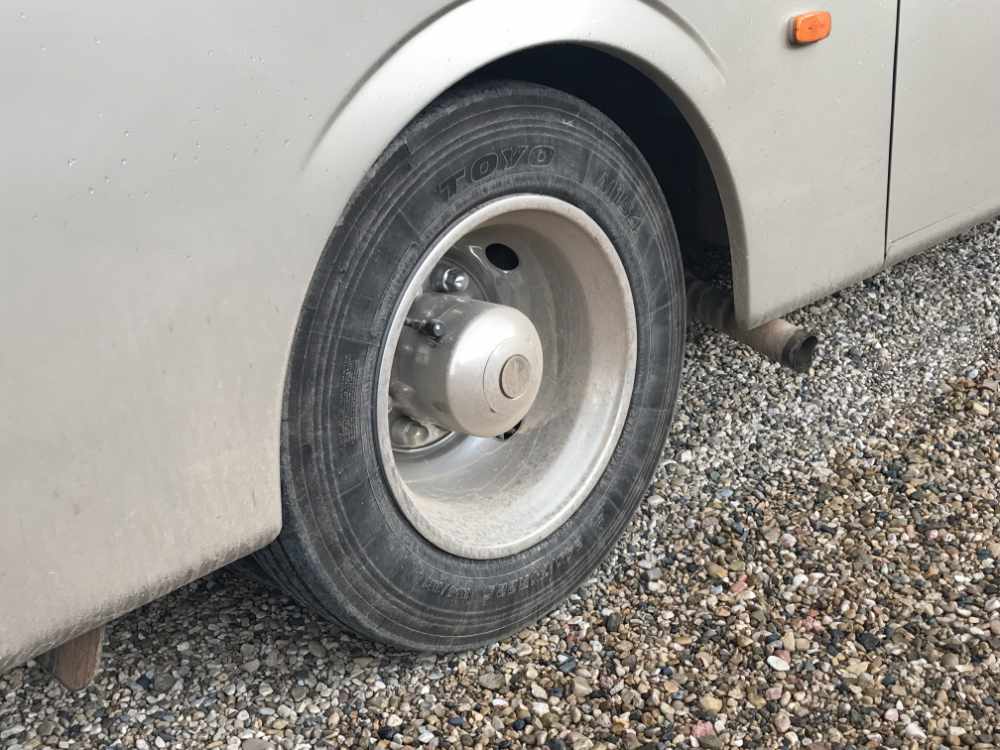
Much of your ride quality is determined by your tires. The two principle factors here are underinflation and overinflation.
Tires that are underinflated could lead to:
- Excessive heat buildup of the rubber, potentially leading to a blow-out
- Vehicle stability issues
- Poor steering and road handling
- Spongy ride
While overinflated tires can lead to:
- Reduced traction, due to the fact that the vehicle is running on less rubber.
- Poor steering
- Hard ride
Now, all tires have max air pressures right on the sidewall. However, the right tire pressures for YOUR rig are unique to YOUR rig. It depends on the weight distribution of your motorhome… and can change depending on what you’re carrying around inside.
So, the only true way to get the right tire pressures is by having the vehicle weighed. Find a place that can weight the motorhome (while loaded like you’re going on a trip) and you will get weight measurements for all 4 wheels.
With the weights in hand, you can consult a load inflation table specific to your tires. You spot the weight range on the table for each tire and the table will tell you the right level of inflation (in PSI) for that tire on your rig.
- Michelin RV Tires Load And Inflation Tables
- Goodyear RV Tire Inflation Tables
- Toyo Tire Load & Inflation Tables
- BridgeStone Load & Inflation Tables
- Firestone Load & Inflation Tables
Google is your friend here. So, if you are using a different brand of tire, just Google for the right inflation tables.
Now, if you don’t do a proper weigh-in, you can “ballpark” the tire pressures and just… guess. The issue isn’t so sensitive that you risk a major blow-out by not being right on the money. But, it is best to make it right.
You can usually weight your motorhome at a lot of truck stops.
Looking For Worn Parts
Another issue that could lead to the vehicle wagging around is simply worn-out stock equipment. So, it is good to check the stuff which is already built on before you go adding after market upgrades.
For instance, if your have shackle bushings or control arm bushings that are worn and loose, the wheels can end up walking around instead of riding in a straight line. You can check this with the vehicle jacked up by just prying around on the bushings to see if there’s wiggle. You can also check your front axle by taking the tires off the ground, grabbing the top and bottom of each tire and seeing if you can wiggle the wheel in place.
While your tires are up, see if you can wiggle the wheels front to back. If you can feel looseness or slack in the steering mechanism, then you have worn components in your steering mechanism, too. The bell crank bushing is a common wear point.
If all the stock equipment is in good order and things feel tight, then it is time to look at some potential improvements…
Installing a Trac Bar
The issues above can sometimes be mistaken for the tail wag and that’s why I wanted to mention it. But, the actual tail wag effect is indeed what it sounds like.
The issue is at the rear or the RV and is caused by the long overhang. Typically, you have the rear axle back there and then, depending on the length of the rig, you could have 10 feet or more of house that sits PAST the rear axle. In my rig, my rear axle is right below the bathroom area, so the entire rear bedroom is floating out there past the rear axle.
So, the rear axle is the pivot point. So, whenever wind pushes the rear of the RV, it will try to pivot around the axle and lead you to feel like you need to correct by steering. You will feel like you need to steer in the opposite direction of the push on the rear to keep the vehicle driving in a straight line.
It can be quite noticeable when trucks are passing you. A massive air column is being pushed by that truck. When it hits the rear of your rig, you feel you need to steer one way to correct. Then, as the truck passes, the vacuum suction of that air causes you to need to correct to the other side. It can be a heck of a ride. 😉
A rear trac bar can be installed on the rear axle to help reduce this wagging effect. A trac bar keeps the body from being able to laterally shift on top of the axle. By keeping the frame and body right in line with the axle, it reduces the pivot effect around the axle. This means the vehicle will drive straighter, with less steering wheel play, and will not be nearly as loose with side winds and passing trucks.
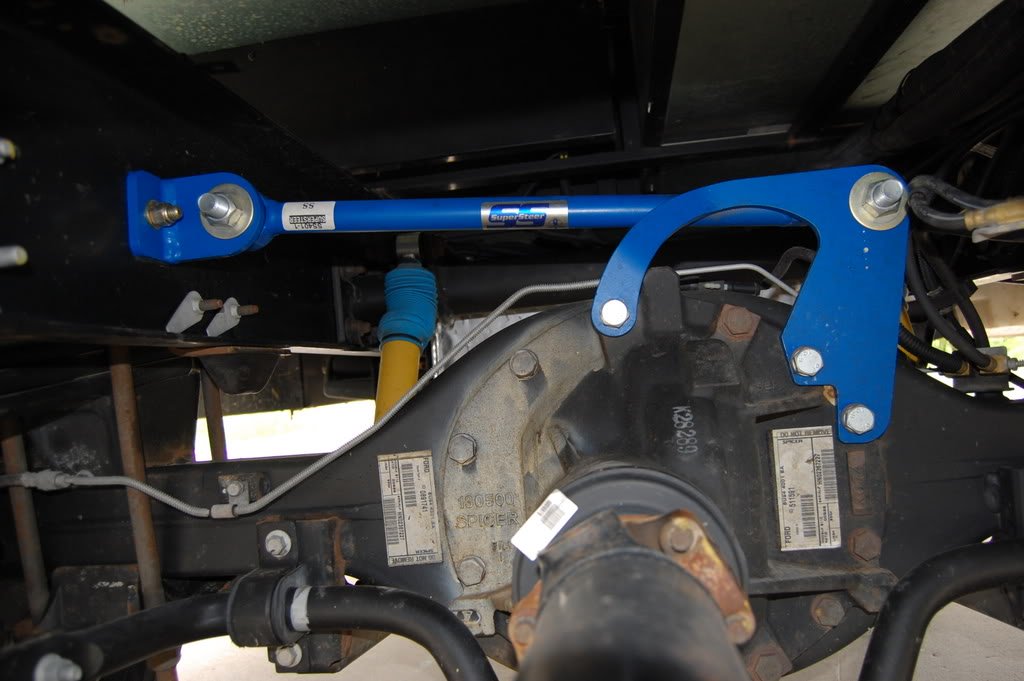
There are several trac bar options out there, just like for anti-sway bars. You’ve got:
- Roadmaster
- Super Steer
- UltraTrac
Just make sure you get one specific to your chassis.
What About Steering Stabilizers?
A lot of people like to install steering stabilizers on their rigs. I, myself, installed the Safe-T-Plus unit on my motorhome.
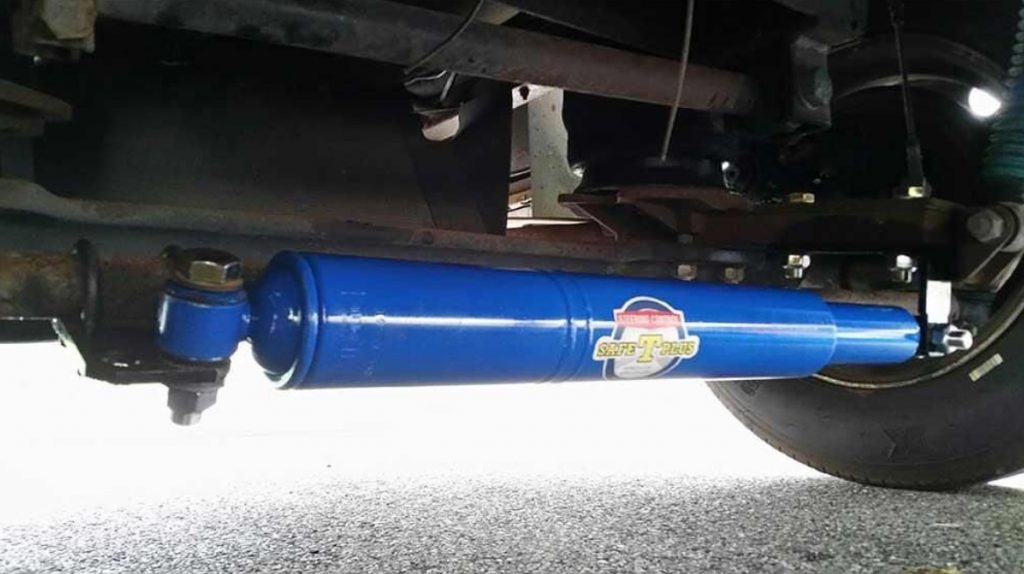
These stabilizers are marketed as ways to reduce road wandering, the wagging effect, and the need for continual steering correction. And, yes, they can help. But…
If you’ve been reading along here, then you know that there are definitely other factors at play that can lead to those issues. If you ignored all that and simply installed a steering stabilizer, you might not get the desired effect or may find yourself underwhelmed with the difference.
All a steering stabilizer does is provides a spring and shock absorber to your steering rod. That will help absorb road vibration that leads to play in the steering wheel. It will put a little resistance on the steering, helping it feel tighter and helping it return to center after a turn. Some positive effects will be:
- Easier to drive with one hand since the wheel won’t take so much correction.
- Easier return to center after a turn, more like you’re used to in a car
- Less back and forth steering correction
- Easier to maintain control over bumps, ruts, or if you go off the edge of the pavement. Instead of riding the rut, the stabilizer will help keep the vehicle going straight.
- Will help you maintain control of the vehicle in the event of a front-tire blow-out.
I saw a definite improvement after I installed the Safe-T-Plus. But, again…
It is not the universal handle to all steering issues. If you’ve got a crazy tail wagging going on in the back due to loose bushings and no trac bar, you’re still going to have some correction issues. It’ll be better, but not gone.
It is a nice improvement, though. It provides some peace of mind for the rare event of a tire blow on the front (which can make your Class A quite unstable). And it overall helps to make driving your RV more like… a big car.
Do You Need All Of It? What Helps The Most?
So far, we’ve talked about a number of potential upgrades to improve your Class A ride handling:
- New shocks
- SumoSprings
- Anti-Sway Bars (front and back)
- Rear trac bar
- Steering Stabilizers
If you did all of it, you’d have a pretty great driving experience. About as good as you can get on a gas-powered motorhome. But, it can get expensive.
So, do you need to do all of it to get an improvement?
Of course not.
You can also do pieces of it over time.
People have different opinions on what are the most important or beneficial upgrades to do if your budget is limited.
On my rig, I have installed a steering stabilizer, a rear anti-sway bar, and new Koni FSD shocks. It made a marked difference, but it didn’t solve every problem.
For one, my rig still has a sway problem on turns. So, I am going to be checking the bushings and other stock stuff to see if anything needs to be done there. Also, a front anti-sway bar would be a pretty cheap and simply install so I may just do it.
I’m happy enough with the ride quality that I’m not itching to try the SumoSprings, but I may do it anyway at some point just to see.
And my Safe-T-Plus made steering easier, with my wagging definitely improved despite not installing a trac bar. But, I may do it at some point.
Personally, I think a steer stabilizer would be a good upgrade for anybody – if for no other reason than the safety factor. Blowouts don’t happen on motorhomes as often as travel trailers, but it could still be a doosie if it happens.
I don’t think I would put on new shocks unless your’s are worn and/or original.
If you’re going to do anti-sway bars, focus on the rear. I think you’ll get a bigger improvement on the rear than the front.
A trac bar will help if you’ve got a bad wag, but I’d probably try the steering stabilizer first before it. The wag is mostly caused by the rear, so it is true that the stabilizer isn’t a real solution. But, the improvement you DO see from the stabilizer might be good enough that you don’t notice the wag so much.
Some Final Thoughts
Whew! There’s a lot here! And I hope that I was helpful in summarizing much of this stuff, boiling it down and making it simpler.
Often when you’re figuring out what to do, you will end up wading in a sea of opinions through the RV forums. It can be confusing because everybody acts like they’re an expert, but you’re getting pretty much every possible opinion. And it is just that… an opinion.
If you choose to do any upgrades, I would personally lean toward buying the hardware yourself online with the best deal you can find… rather than going to a shop and having them acquire it for you. Just avoid the middlemen and save the money.
Keep in mind that many of these items will be chassis specific, so make sure to buy the right thing for YOUR rig.
If you are able to install yourself, that’ll obviously save you money. If not, I would recommend finding a local shop that has the ability to work on RVs. I don’t suggest a big chain like Camping World. Find some smaller, independent outfit. Sometimes, you can find shops that work on trucks and they can do this kind of stuff for your RV, too.
Find a shop that doesn’t mind installing hardware that you bring to them. You buy it, they install it. This way you can shop around and get the best deals.
Just be willing to be a smart consumer that doesn’t need to be coddled. It is when you run to the big corporations like Camping Word or LazyDays that you’re going to get the worst deals (usually). Plus, they’ll take forever.
All that said…
Definitely, consider doing some aftermarket upgrades to your Class A gas-powered motorhome to improve the ride.



One thing you failed to mention that can improve the over/ under steer problem is a front wheel alignment.
I would think this should be the first thing one does, even prior to a steering stabilizer.
Excellent article and thanks for your contribution.
Perhaps the RV companies need to put pressure on the industry about these hard driving issues and come up with a standard that works for everyone…should be part of the chassis before it arrives to the RV place of box building etc…this is rediculous that this has never been resolved…we pay big money for these rigs…they need to be made right not cheap…it’s not good for the industry…frustrated Bob
This was an excellent article as I have a 2022 Entegra Vision 29S (31′ 4″, 18K GVWR) which came out of the factory never aligned and undriveable above 45 mph. It is a longe battle to get this RV to drive better. All of the upgrades are additive and improve the conditions tremendously. A couple more items that helped include centramatic wheel balancers and Radius Rods.
I have also experienced that the caster on your wheels should be positive 5 degrees and for wandering problems perhaps a little more toe in (1/8″) helps. The RV drives perfect on primary roads, but when on secondary roads and windy conditions there remains a challenge.
Does anyone have other suggestions for improvements?
It will never be a perfect ride, but is much less expensive than a diesel pusher or liquid springs.
the cost for the liquid spring system on the ford f53 is now $23,500.00.
i emailed yesterday and about fell outta my rv with the reply from a shop in orlando!
Wow. Yeah, no way that’d be worth it.
Looking on Amazon.com for Safe-T-Plus stabilizer for 2011 Ford f53 chassis. Price in the $450.00 range. Does that sound about right??
Yeah, that’s about the ballpark price.
I have a 2018 Newmar Bay Star Sport 3307 (34’ long) gasser on an F53 chassis. It drives like cr*p. We are full timers, having graduated last fall from living in and pulling a 9,500lb 25’ Bigfoot bumper pull trailer behind an F-350 diesel 4×4 for 4-1/2 years to a Class A motorhome. I’ve been researching suspension and steering upgrade options since navigating this big rig is exhausting.
This article does a thorough job of presenting and describing the various suspension upgrade options. One thing it left out was adding leafs to the leaf springs. The results of my research “drove” me and my partner to invest in Liquid Springs. We are having them installed in late February 2022. LS only came out with a front option this past spring. We’re going whole hog, front and rear, for a cost of $25,000. Yup that’s a huge investment, but we are confident that it’s not a huge risk. If you’re interested in LS, read about their history and talk with Wayne Wells at LS.
Based on my research, it is clear that you can spend $4000 to $8500 or more installing all sorts of “bandaids”. Or you can solve the drive-ability problem with these big gas motorhomes by installing Liquid Springs.
To be clear, we have not installed them yet, and we are not selling them. I did read a wonderful review on iRV2 of LS by Jabber Jaw in December 2021. He had them installed in November AFTER trying a suite of the options described in this article. You can go read his review if you’re interested in the details. I also spoke with him. His conclusion is that LS makes his 38’ Newmar gasser drive easily and comfortably. After his review and my talk with him and Wayne Wells of LS, I was convinced that LS would do what I needed done.
As the old saying goes, “You get what you pay for,” much of the time. We are confident that we will enjoy driving our beast after LS is installed. It is definitely a “WHOA” cost-wise, yet we are confident it will be a “DOUBLE WHOA” drive-wise.
We have done all upgrades except liquid springs. Are there any other wind/ air controllers such as things airplanes use on their wings??
thanks for your info,its a help for a new RV’er
Awesome article and great points on updating my motor home.
Thank you. 🙂
Thanks for the insights. Thinking of starting with the steering stabilizer and Sumo’s up front in hopes of reducing some harshness.
Clear, concise, well-written, understandable. Introduces all the important factors to be considered and allows reader to pursue remedies for their particular problems. Well done!